The Problem: Etch doesn’t yet have built-in pagination functionality documented, and while PHP authoring features are on the roadmap, you need pagination working on your sites right now. This is a common requirement for any site displaying lists of posts, projects, or case studies.
The Solution: This client-side JavaScript approach gives you smooth, functional pagination today while we wait for native Etch pagination features. It’s a solid workaround that actually offers some UX advantages – no page reloads, instant filtering, and works on any page type (not just archives).
What You’ll Learn:
Note: This is client-side pagination, meaning all posts load initially then JavaScript shows/hides them. For lists under 50 items, this performs perfectly. For larger datasets (100+ posts), you may want to wait for native Etch pagination.
Let’s build it…
Each post item in your loop needs the article__list class. Obviously, you can create your own class and need to modify the below code, if that’s the case.
{#loop yourLoopQuery as post}
  <article class="article__list">
    <!-- Your post card content -->
    <h3>{post.title}</h3>
    <div>{post.excerpt}</div>
    <a href="{post.permalink}">Read more</a>
  </article>
{/loop}
Key point: Every item needs class="article__list" for JavaScript to target them.
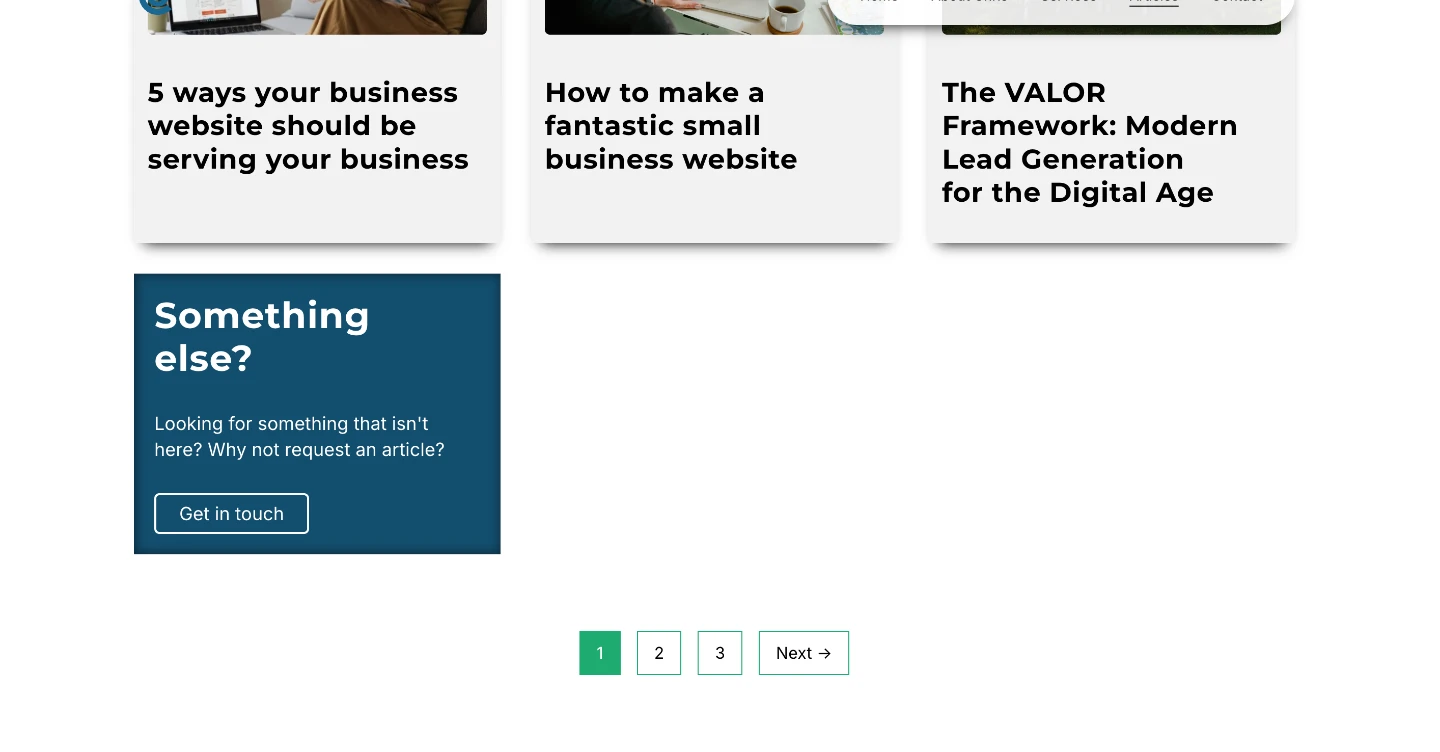
Below your loop, add a section with this HTML:
<div class="pagination-wrapper">
  <nav class="pagination">
    <ul class="pagination__list"></ul>
  </nav>
</div>
The <ul class="pagination__list"> is empty – JavaScript will populate it with buttons.
Add this to your page’s JavaScript section
document.addEventListener('DOMContentLoaded', function() {
  const itemsPerPage = 5;
  const items = Array.from(document.querySelectorAll('.article__list'));
  const paginationList = document.querySelector('.pagination__list');

  if (!items.length || !paginationList) return;

  const totalPages = Math.ceil(items.length / itemsPerPage);
  let currentPage = 1;

  function showPage(page) {
    items.forEach((item, index) => {
      const startIndex = (page - 1) * itemsPerPage;
      const endIndex = startIndex + itemsPerPage;

      if (index >= startIndex && index < endIndex) {
        item.style.display = '';
      } else {
        item.style.display = 'none';
      }
    });

    // Scroll to top of list
    window.scrollTo({
      top: document.querySelector('.article-grid').offsetTop - 100,
      behavior: 'smooth'
    });
  }

  function createPagination() {
    paginationList.innerHTML = '';

    // Previous button
    if (currentPage > 1) {
      const prevLi = document.createElement('li');
      const prevBtn = document.createElement('button');
      prevBtn.textContent = '← Previous';
      prevBtn.classList.add('pagination__link');
      prevBtn.addEventListener('click', () => {
        currentPage--;
        showPage(currentPage);
        createPagination();
      });
      prevLi.appendChild(prevBtn);
      paginationList.appendChild(prevLi);
    }

    // Page numbers
    for (let i = 1; i <= totalPages; i++) {
      const li = document.createElement('li');
      const button = document.createElement('button');
      button.textContent = i;
      button.classList.add('pagination__link');

      if (i === currentPage) {
        button.classList.add('current');
      }

      button.addEventListener('click', () => {
        currentPage = i;
        showPage(currentPage);
        createPagination();
      });

      li.appendChild(button);
      paginationList.appendChild(li);
    }

    // Next button
    if (currentPage < totalPages) {
      const nextLi = document.createElement('li');
      const nextBtn = document.createElement('button');
      nextBtn.textContent = 'Next →';
      nextBtn.classList.add('pagination__link');
      nextBtn.addEventListener('click', () => {
        currentPage++;
        showPage(currentPage);
        createPagination();
      });
      nextLi.appendChild(nextBtn);
      paginationList.appendChild(nextLi);
    }
  }

  // Initialize
  createPagination();
  showPage(1);
});Add this CSS to your global stylesheet:
.pagination {
  margin-top: var(--space-l);
}

.pagination__list {
  display: flex;
  gap: 0.5rem;
  list-style: none;
  padding: 0;
  justify-content: center;
  flex-wrap: wrap;
}

.pagination__link {
  padding: 0.5rem 1rem;
  border: 1px solid var(--primary);
  background: transparent;
  cursor: pointer;
  text-decoration: none;
  transition: 0.2s;
  font-family: inherit;
  font-size: inherit;
}

.pagination__link:hover {
  background: var(--primary);
  color: white;
}

.pagination__link.current {
  background: var(--primary);
  color: white;
  pointer-events: none;
}Client-Side (what you have):
Server-Side (WordPress archives):
/page/2/)Use client-side (your current setup) when:
Use server-side when: